Advertisement

Thursday, June 7, 2012

Board Etching Part 2

We talked about Board Etching Tools in part 1, in this part we will know how to design and make the board

We will begin to design the tracks of any circuit with any graphic programs (Photoshop) or (Pointshop) or even the (Painter) and if the design is ready such as ready-made circuits, then all you need is to print the circle on the transparent paper.

Note: You can directly draw on transparent paper or use the printer, thus we just got the tracks of the electronic circuit on transparent paper .

Now we take the film board and remove the plastic layer that protects the light-sensitive material .
And then put the design that we have prepared and put it on the Board at the  the light-sensitive material side  .

Now we put the Board design that we made it directly to the UV or neon lamps box and leave it for five minutes .

Note: for who did not use the UV box and replaced it with lamps or Neon Light try to maximize the duration and experiments in order to get the same result .


We should now remove the Film Board from the lights box, you will note that the lines that were not affected by the lights are the circuit board lines and it's almost yellowish green, while the areas that exposed to the lights has become almost like the color of copper .

Now we should prepare the cleaning material by placing 10 grams of sodium hydroxide in a container that has one liter of water and leave it for a quarter of an hour .
Then we put the film board within the solution, and evenly move it until the light affected part is removed .

And then we will show the copper layer, then remove the board from the solution and washed with the water and dry it .

Now this is the most important and most dangerous step where we put the board within the chemical acid to remove the  unwanted copper layer .

Warning: Do not directly touch the acid by your hand, you must wear thick rubber gloves and beware of flying material on the body, and keep it out of children reach .

Note: The period of leave the board in the acid is depending on the acid concentration and the type of the used board, you can check it from time to time to make sure that the process is complete .

We now should remove the Board from the acid and wash it with water then dry it, then we check the lines to make sure that there is no thing wrong with it .

Now we will make necessary holes for the electronic parts legs on board .

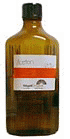
We now remove the film layer around the holes and places that will be reached by welding material that can be done using copper wire with a little amount of alcohol .

In the end we have a full professional Board with the tracks, and we can install the electronic parts using a welding caustic .

Board Etching Part 1

This process of board etching and the work of the tracks is almost the same method used in factories to make parts of the radio and various electronic devices, but in a more professional way .

This process is very important to the work of any electronic device and must be known by any inventor, and here we illustrate the easiest and the fastest and least expensive and are as follows :

Tools needed for this process :

Board needed in this process, a Board covered with copper and then covered with a substance affected by light and is called (Film Board )

Plastic transparent paper, the same plastic used in the projector presentations and will use it to print on it


Grains of sodium hydroxide, a cleaning substance

Special chemical acid dissolves unwanted copper and here we will use the ocean iron hydroxide

Small drill with 0.5 mm or less

Board cutter or any other tool serve the purpose

Ultraviolet radiation box and neon lamps can be also used 

To Be Continued in Part 2 ...

Tuesday, May 29, 2012

Fix fluorescent bulbs failures

In this post we will discuss the most issues and failures related to fluorescent bulbs and how to fix it yourself


Diagnoses 
Reasons 
How to fix it 
Bulb lights after a certain period of operation and then turn off the lights again

Does not light up at all

Flashing at intervals 
Bulb damage because of the amount of air leakage in it, or due to corrosion priming bulb 
Replace the bulb 
The new bulb is flashing 
The bulb is bad

Starter is bad or inappropriate

Trans is inappropriate

Bad connection
Replace the bulb

Replace the trans

Check the wires and clean it from dust 
Blackouts in both sides of the bulb

   A dark ring on each end of the bulb
End of life lamp

Wick does not radiate electrons 
Replace the bulb 
A dark ring in one end of the bulb 
The separation of the wiring base of the bulb

Disconnecting of wires connecting trans

Disconnecting in one of  bulb priming
See the wires connecting the lamp base

Check trans connections

Replace the bulb 
The new bulb flashing on short periods
Starter is inappropriate

 Trans is inappropriate

Combustion of trans

Removing the wires connecting the lamp base

High value of the voltage
 Replace the starter

Replace the trans

Replace the trans

 See the connections

 Turn off the lamp until the voltage value to be returned to the normal value
The light is not normal 
Lower the value of the voltage

 Disconnecting of the circuit wires

 The accumulation of dust on the surface of the bulb 
Turn off the lamp until voltage value to be returned to the natural value

Check the connecting wires

Clean the outer surface of the bulb and keep it dry 
Noise associated with the  operation of the bulb  
Trans type is bad

  Trans is not installed well on the bulb holder

 High temperature of the trans because the long operating period 
Replace the trans

Install the trans in a good way

Take into account that trans installed so that it is exposed to air in order not to result in high temperature and combustion of it 

Monday, May 28, 2012

Photoelectric Devices

Light Sensitive Devices :


The light-sensitive elements to respond to changes that occur on light intensity and by changing the internal resistance (ie, less than the value of its resistance to increase the intensity of light), and is called light-resistance (photosensitive resistance) .


Or generate electricity and increase the intensity of power to increase light intensity of photosensitive cells abd also called solar cells.


Photosensitive Resistance :


The value of this resistance decreases by the intensity of light falling on it's made of the photoelectric light-sensitive materials (such as cadmium sulfide) (Cds) or (Slitid cadmium) (Cdse), Although other materials such as (lead sulfide) has been used. They can also improved with other materials such as copper or chlorine, in order to improve the work of the resistance in order to adjust the correct way that they change the value of the resistance according to light intensity.

Most of the Photosensitive Resistors can afford voltage range between 100v and 200v and 300v but consumption (watt) the great ability of these elements varies between 30 million and 300 million Melli Watts.


Photosensitive Resistance has many applications in electronics, for example often used in Alert devices and automatic door mechanism where a sense of the presence or absence of light is required and the following figure shows one of the simplest applications of this element.


With the development of science electronic photoelectric element has been manufactured of silicon which is similar in terms to the transistor structure.


It's the phototransistor however it's different that transistors base is light-sensitive material controls the amount of power that passes from E to C.


It can be used in : Alarms, Automatic doors  mechanism, close the blinds in the absence of the sun or vice versa, and other devices that requires a sense of light. It is also used in television sets as a receiver for the remote control.


Transistors are characterized by the possibility of working with the invisible light such as infrared, where it can be used in alarms against thieves.


Sunday, May 27, 2012

Soldering Gun


Soldering Gun is an Adapter which lowers the voltage and raises the power, Connected to it's Secondary end copper wire (yellow copper ring) to be the soldering head.


Soldering gun  is characterized by the following :

1- Quick access to the melting temperature of the soldering material - copper - tin so it is provided with trigger pressure during the welding process where the temperature reaches about 600 degrees Celsius within a few seconds.
2- High ability up to several hundred watt and thus carry out the soldering of large wires and large pieces with the highest known efficiency.
3- Small size despite it's ability.
4- High reverberate, the lost power to be low and the adapter is cooled through the holes in the body of the device.
5- Easy to replace the soldering head which is yellow copper.


How it's working :

The following figure shows the internal structure of the soldering gun
It is a converted raise stream to up to 100 AMP in it's secondary end which closed with a soldering head which is yellow copper and zinc - with it's electrical resistance much be higher than the pure copper, which the secondary circuit made of.


Primary coil has large number of rolls and thin diameter wire
And the power which passes is low-intensity
While the secondary coil consists of few rolls (sometimes one roll)
However, with a large diameter wire to pass high voltages


While the adapter is working on a permanent basis makes great heat generated in the secondary coil and the adapter itself so it has provided with a key to run only for a period of work - as long as you are holding it - and when you left it the power is stopped.

It's advised not to be used on electronic circuits and exclusively away from the semiconductor and electronic slides.